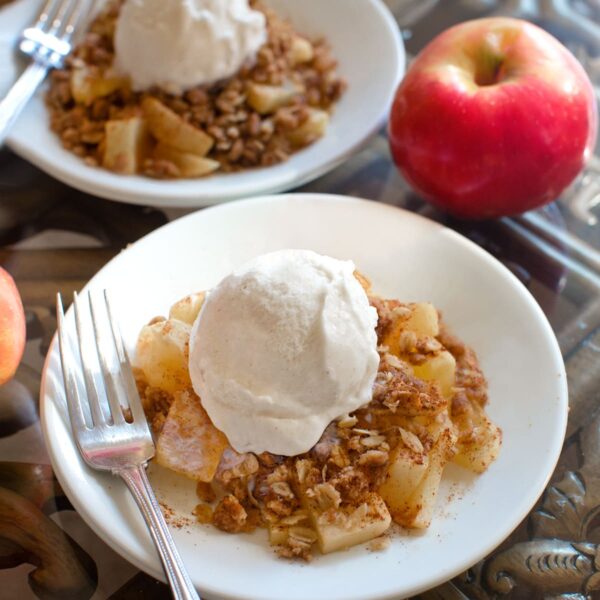
These baked apples are perfect for Fall… a healthy dessert that tastes absolutely delicious!

As siblings, my sister and I could not be a better match.
At least when it comes to our feelings about apples…

I adore apple pie filling.
(She hates it.)
She loves pie crust.
(It’s not my cup of tea.)

Growing up, whenever we’d go to Outback Steakhouse for dinner, my sister would always pass me the baked apples that came with her meal. And whenever we’d dine at a fancy restaurant with apple pie on the menu, I’d take the apple pie filling, and she’d eat the crust.
Now that we no longer live together, there isn’t anyone around to eat the crust to my apple pie. Therefore, these baked apples are done my way—extra apple pie filling and NO crust! (If you are on Team Crust with my sister, feel free to use my Healthy Pumpkin Pie Crust recipe, cut it into strips or shapes, and layer it over the apples right after you fill them.)

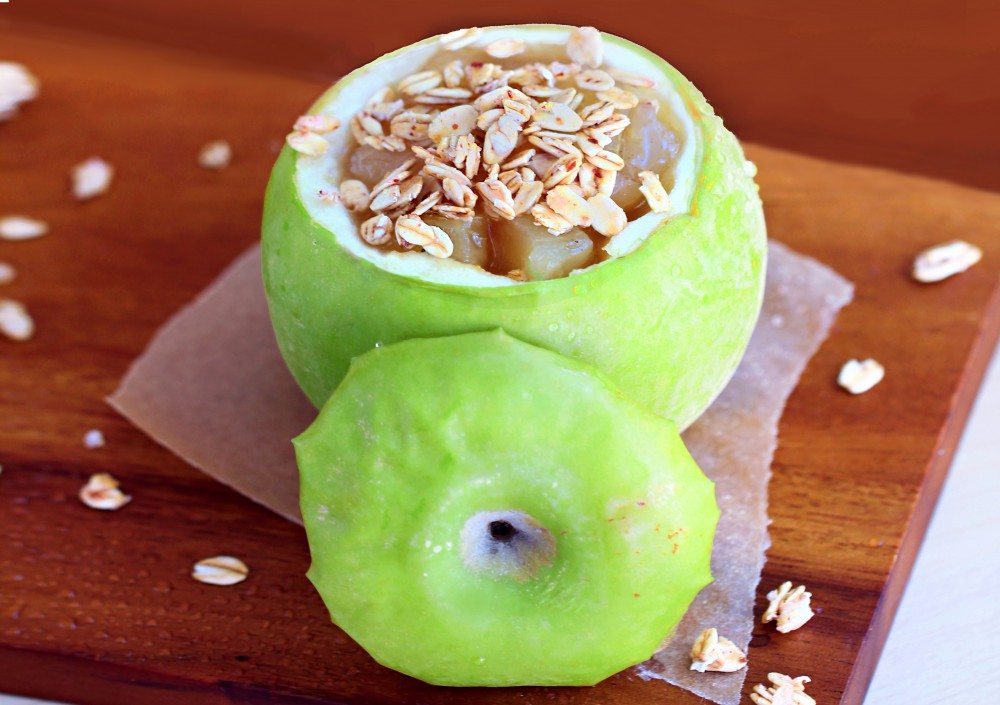
(Iphone photo above)
Baked Apples Recipe
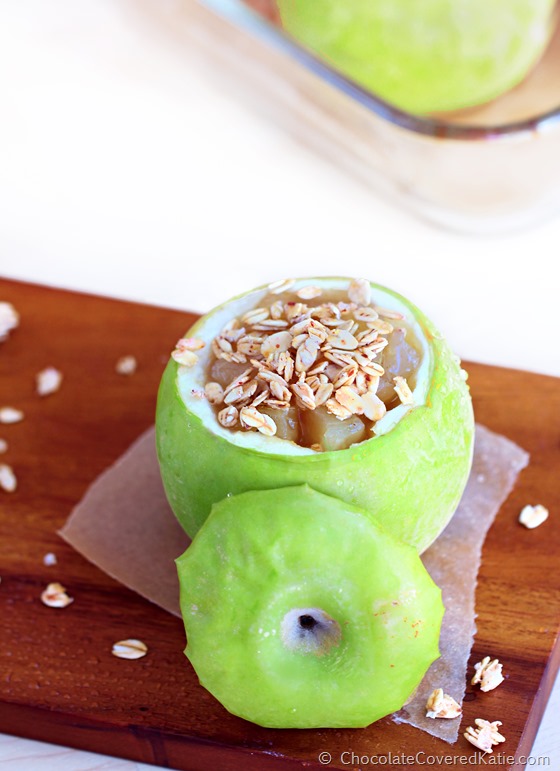
Crustless Apple Pie Baked Apples
Ingredients
- 2 1/4 cups chopped apples (about 2 apples)
- 1/3 cup water
- 1/2 tsp cinnamon
- pinch salt
- 1 tbsp cornstarch or arrowroot
- scant 1/8 tsp uncut stevia OR 1/4 cup sugar of choice
- 2 tsp lemon juice
- 1/2 cup apple juice
- whole apples (filling makes enough to stuff 12 apples, but you can make fewer if you want leftover filling to eat plain or to top waffles or pancakes)
- granola or ice cream (such as my ice cream recipe), if desired
Instructions
(The filling can be made a day or two ahead of time if desired. Or, if you’d prefer quicker a baked apples recipe, feel free to use canned or jarred apple pie filling instead of my homemade filling.) For the filling: Place 1 cup of the chopped apples in a small pot with the water. Bring to a boil, then cook on low for 7 minutes. Meanwhile, blend all other ingredients except the whole apples in a blender until smooth. Add the blended mixture to the saucepan and bring back to a boil. Immediately turn to low heat and cook 30 minutes, stirring very occasionally. Let cool, then refrigerate uncovered or loosely covered. Wait at least 4 hours before proceeding with the recipe, as this filling thickens in the fridge.
For the baked apples: Preheat oven to 350 F, and grease a baking pan or line with parchment paper. Slice the tops off each whole apple, and scoop out the center by cutting around the core with a knife and then scooping out the core and a bit of the flesh with a spoon. (Eat the scooped out flesh, or save for a different recipe.) Place in the pan and bake 22 minutes, then remove from the oven and scoop about 3 tbsp (or as much as you can fit) filling into each baked apple. Return to the oven and bake another 14 minutes. Finally, broil 2-3 additional minutes.


Link of the Day:


these are so cute! can’t wait to try out this recipe 🙂
Great recipe! I want to make it with the crust you used for your pumpkin pie, but it says in that recipe to prebake the crust. Would you do the same for this apple pie? I’m omitting the baked apples and using a crust. Thanks!
No need. Just bake it along with the apples!
. . . I think I go for both. I think the filling and crust together is the perfect combo – that’s why they are made into a dessert together! 🙂
These look so insanely tasty! Pinning now, I need this in my life! Unfortunately for me, my sister loves both and so do I
OMG! This is super fabulous! I am so making these tomorrow. My kids will love them! Thanks for the excellent recipes. 🙂
These look delicious! I have to admit I’m a crust person, I just love the flaky buttery flavor.
These look really good. I don’t have arrowroot or cornstarch…think xanthan gum will work in its place?
Crust is life
This looks so adorable! This recipe is definitely going to be on my to-do list, perhaps with different types of apples, some red/yellow and green would look fantastic!
This is such a good idea! I’m not a fan of pie crust but I do love crumble toppings which I think would work great with this recipe. I’ll be keeping this in mind for xmas, i’m always on dessert duty!
These look so pretty!
I myself love crust, and wouldn’t mind making some apple-filled parcels with this, but when you want a little lighter treat, this fits the bill – awesome 😀 x
Whooaaaa! What a genius idea! They look so delicious!
Yum yum yum! Perfect for fall!
such a cute little dessert! yum!
Fabulous! I’m going to make these for Thanksgiving!
You are probably the most creative person ever! What a cool idea! Are you going to include more non chocolate recipes on your website?