Did you know that you can make thick and completely vegan coconut caramel sauce from a can of coconut milk?


1 can coconut milk
Pure vanilla extract
Sweetener of choice
Pinch of salt
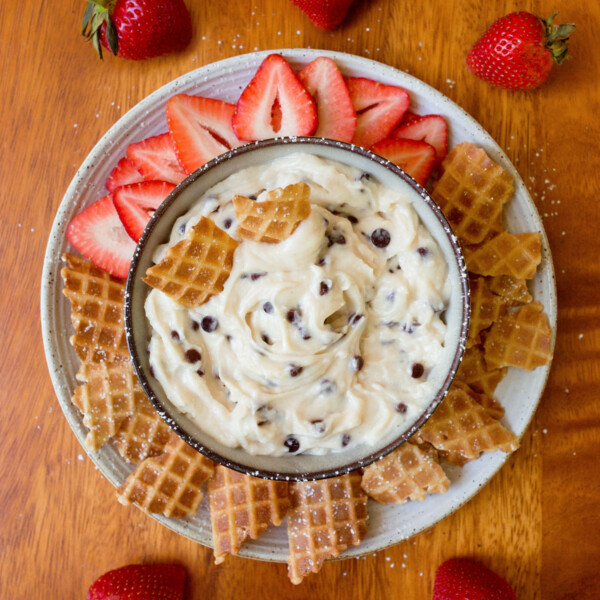
Just four or five ingredients, and you’re on your way to the perfect coconut caramel sauce, good for serving with fruit, pancakes, or over my Banana Ice Cream Recipes.
And the best part is that there’s NO heavy cream and NO high fructose corn syrup required for this recipe!
Above – Watch the video how to make coconut caramel!
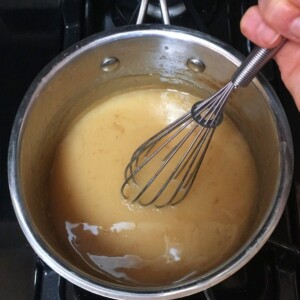
Step One:
Combine all ingredients except vanilla extract in a medium saucepan, and whisk everything together.
Bring to a boil, then let it boil for around 3-4 minutes.

Step Two:
Turn to a simmer, and let the mixture cook down to about half its original volume, stirring as needed.
Turn off the heat, stir in the vanilla extract, and let the vegan caramel cool. Then refrigerate.

The homemade coconut caramel sauce will continue to thicken overnight.
Use it as you’d use caramel sauce.
It tastes absolutely amazing over homemade Coconut Ice Cream.

Or try it on top of this Frappuccino Recipe!
Stored in the refrigerator, the jar of vegan caramel sauce will last for at least a week.
I don’t know if it lasts longer or if it can be frozen, because I’ve never been able to keep a batch around long enough to find out!
")
Coconut Caramel Sauce
Ingredients
- 13.5 oz coconut milk (Coconut-free recipe here)
- 1/3 cup pure maple syrup, honey, or agave
- 1/4 cup brown sugar OR simply increase the above liquid sweetener to 2/3 cup
- 1/2 tsp pure vanilla extract
- 1/4 tsp salt
- optional 1 tbsp butter-type spread or coconut oil, for richer flavor
Instructions
- *Use the brown sugar (or coconut sugar) if you want more of a caramel flavor; however using all liquid sweetener still yields delicious results. Make sure to buy full-fat canned coconut milk, not lite or coconutmilk beverage.Combine all ingredients except the vanilla extract in a medium saucepan. Bring to a boil. Let it boil for around 3-4 minutes, stirring continuously, then lower to a simmer. Let it simmer—stirring as needed—until it cooks down to about half its volume and thickens. This usually takes around 50-60 minutes, depending on your climate, stove, and the fat content in your particular can of coconut milk. Turn off the heat, stir in the vanilla, and let it sit for about an hour. Cover and refrigerate overnight – it continues to thicken as it sits.Instant Pot Version: Combine all ingredients except vanilla in the instant pot, and use the sauté setting. Bring to a boil, stirring occasionally, and let cook down until thick, about 20 minutes. Turn off, and stir in the vanilla. Thanks to reader Jaclyn for creating this version and commenting to let us know it can be made in an instant pot!View Nutrition Facts
Video
Notes

More Healthy Desserts


It would be helpful to know quantities.
Hi, what do you mean? Specific quantities of all ingredients are listed in the recipe.
Quoted from the text:
13.5 oz coconut milk (Coconut-free recipe here)
1/3 cup pure maple syrup, honey, or agave (vegans use the maple or agave)
1/4 cup brown sugar OR simply increase the above liquid sweetener to 2/3 cup
1/2 tsp pure vanilla extract
1/4 tsp salt
optional 1 tbsp butter-type spread or coconut oil, for richer flavor
Woah that looks amazing! Who knew you could turn coconut milk into that!!
No way! I would have never thought of this. You have such creative, fun ideas.
How does this compare to Dulce de Leche?
I did a quick google search, and it seems like many people say the two are interchangeable (taste-wise). Traditionally, they (caramel and dulce de leche) are made with different ingredients, but of course this recipe is made with different ingredients from both of them. Especially considering dulce de leche is made with sweetened milk, I’d think this recipe would be pretty similar!
Making this tonight!!! Yum!
Does this need to be the full fat coconut milk, or will light work?
Under instructions it says… “Make sure to buy full-fat canned coconut milk, not lite or coconutmilk beverage.”
whaaaaaat i had no idea you could do this!!!! what a delicious and (fairly) healthy sauce to keep on hand. it’s always pumpkin season to me, so i think i’ll take your suggestion and use it to top pumpkin pancakes 🙂 thanks for sharing!!
there are two different recipes here…..and quite different from one another. I’m confused. What is the difference between the two and why do you have two recipes for the same caramel sauce? Or are they for different things?
Hi, can you explain what you mean by two recipes? I only see one recipe on this post.
Julie (media director)
The list of ingredients at the beginning of the blog post is slightly different than the one at the bottom of the blog. The first list has 4 ingredients, the bottom one has 6 (one is optional). I’m assuming that’s what she was talking about. 🙂
Four ingredients are not optional – the two variations are optional. Hope that helps clarify! 🙂
Hi,
This look super good I will be making it tomorrow . I was reading the posts to find out the comments on the taste or if someone already made it ..anyway as I am reading this so many questions about this simple recipe ! Your recipe is very explanatory , i think people are not reading the directions ……..Thanks I will write a comment when I am done making it .
Thanks
This looks great! Although, if more into a low calorie caramel, follow my recipe: 1 can light coconut milk and 1/2 cups coconut sugar (if you like sweet caramel, use 2/3 cup coconut sugar instead). Mix and bring to a boil, always mixing for about 15-20 minutes for a sauce and 25-30 for a hardening caramel. Turn off heat and add salt and vanilla to taste. It’s about 35 calorie per tablespoon.
That sounds delicious! Excited to know it works with lite coconut milk!
This caramel looks delicious! Always great with a low calorie version too, so thanks to both Katie and Mary Jane for sharing yummy recipes! 🙂
Thanks! Do you know if this caramel can be made hard enough to be used in caramel squares?
Looks delicious! I have been wanting to try date caramel, and this looks worth trying too 🙂