Julie Andrews had it right.
The beginning is a very good place to start.
I wish we could jump right to part 2 and talk photo flair. (Ribbons! Flowers! Glitter!)

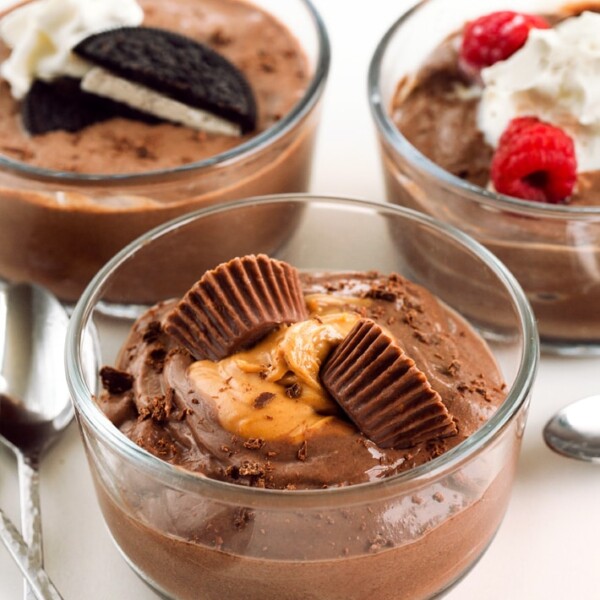
In the above picture: Chocolate-Peanut Butter Fudge.
I often skip through the first few steps while reading directions. (I’m especially notorious for skipping directions when assembling something. Does anyone else do this?)
Unfortunately, skipping directions in an attempt to save time can occasionally backfire, leaving me confused and even costing time in the long run.
So let’s start at the very beginning…
Food Photography: The Basics
Good news!
You do not need to have a fancy digital camera to take advantage of these tips. I haven’t taken any photography courses, and therefore it would be ridiculous for me to offer you technical tips on how to work your digital camera.
What I can offer are some basic photo-styling tips you can use with any camera. These tips are all ideas I’ve learned from experience; trial and error.

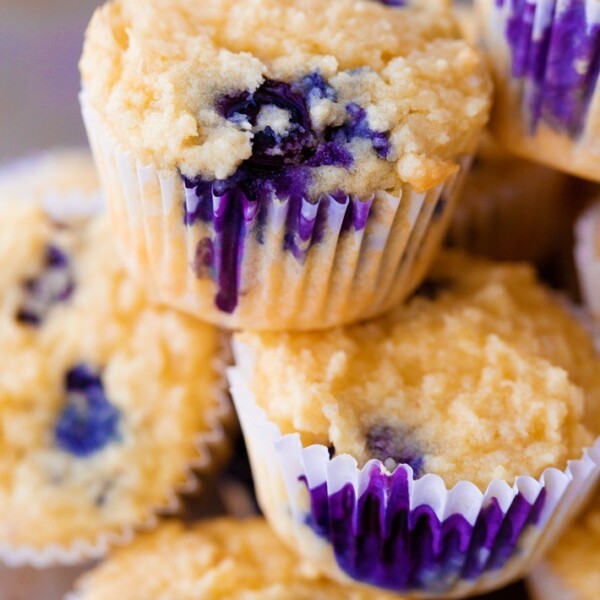
Photo taken with natural light: Peach Breakfast Cobbler.
Tip #1: Listen to Nelly Furtado
Turn off the lights! That goes for your camera’s flash too.
When photographing food, keep the flash off at all times. Walk around and try to find the area in your home that has the most sunlight. I take photos almost exclusively in my living room, and usually somewhere around 11-4pm, because this is where/when I’ve found the best lighting conditions. Sometimes I take photos outside, too. Overcast days are great for this; too much sunlight can cast ugly shadows and make your photos look harshly overexposed.

Photo taken in my living room: Healthy Starbucks Frappuccino.
Tip #2: Keep it Steady!
You’d be surprised at just how much havoc a tiny shake of the camera can wreak on a shot. It baffles and frustrates me they’re doing away with viewfinders in point-n-shoot cameras, because holding the camera right up to your face allows you to be much steadier than if you hold the camera way out in front of you, without anything to brace it.
If you have a tripod, use it. (Do as I say, not as I do. I have a tripod—somewhere—but am too lazy to set it up, and therefore never use one.) If you don’t have one, or if you’re lazy like me, make sure to keep the camera as steady as you absolutely positively possibly can.

Above, on a white plate: Creamy Chocolate Fudge Pops.
Tip #3: White makes Right
Also known as the KISS principle (“keep it simple, stupid”)
When I started out, I made the mistake of thinking fancy = better when it comes to dishware. In reality, if you look at the pros, they often use very basic dishware so that the food, not the plate, holds center stage.

Above, Flourless Chocolate-Chip Cookies.
Questions of the Day:
Are you interested in photography at all?
And do you ever take pictures of your food? What are your favorite things to photograph: Food? People? Nature?


Thanks for the tips! I definitely need to buy more plain white dishes. Colorful dishes are pretty but not the best for photography..
Love this post! I just got a Canon Rebel (early birthday present from my sweet husband), and I am SO EXCITED to start taking food pictures!
Thanks for the tips! Your photos always look gorgeous!
Your house has immensely better natural light than mine. We have these stupid tinted windows to keep the house cool, and none of our windows actually face east or west, so our light inside is crap. I usually try and take my stuff outside, and either have it on the porch in the shade, on the deck under the canopy, or hope its cloudy. Setting/rising sun works too, and sometimes things look interesting when they are over exposed.
I also agree than in general, basic white is the way to go with dishes. But, you can also add flair with the right kind of patterned/colour dishes. Even photography rules are meant to be broken 😀
Oh LOL no! My house is horrible for lighting! Really horrible. All the walls are dark red or yellow, which casts such an ugly shadow! There’s only one place where I can actually get decent light, and even then it’s only for a period of about 2 hours! When I was little, we had a gorgeous indoor porch… that would’ve been perfect for photos. It was like a giant lightbox! Too bad I had no interest in photography back then!
Hi Katie,
Very good tips. I’ve been shooting in our production kitchen and have run into some issues with all of the stainless steel and the reflections(without flash). Your images (and the food) look great for not having a fancy camera and keeping it simple – very nice!
Drew Warner
Thank you so much for doing these posts Katie! 😀
I am having a hard time finding a good light source. our house is like a cave! no big windows and mostly it’s really din 🙁
Ugh I hear ya! I moved into a small place, and there’s very little light… But I also live in Texas, so going outside means harsh shadows. I am so jealous of those soft white light rooms that some people have!
I have to rely on setting my manual exposure a few stops overexposed, and I also add light with Photoshop.
I love how down-to-Earth your photography tips are. The pros make it sound so complicated! Heheh. And I’m slowly improving on my food photography without buying a pricy DSLR camera, though they take lovely pictures.
Hi Katie,
Thanks for the tips. Why is a flash so bad to use with food photography?
Thanks so much for those awesome tips! You’re photos are always really pretty, so any words of advice from you are very much appreciated. I have two questions for you now so that i can try to improve my pictures.
1. Do you have any ideas on how to take pictures without natural light? Like people above have said, at the time when i usually take my pictures there isn’t much light and i’m not exactly sure what to do about that. Is there a way to create natural looking light?
2. I always always always like when someone can give me some good ol’ constructive criticism. If you have a chance could you check out my blog that i just started and give me your opinion on the pictures? The link is http://mouthwateringfoods.blogspot.com/. I don’t mean to beg for you to check it or anything like that, but if you could take a quick look it would make me very happy.
p.s. I recently discovered your blog and though i’m not a vegetarian or a vegan i absolutely love it! Great job on the recipes and, as i mentioned above, the pictures.
Hi Sophie!
I hear you on the lighting thing… I actually live in a VERY dark, tiny house. I rely on higher iso (often 400), higher f stops (2.8 and 3.2 are favorites), and post-processing (photoshop) for help with light. But to be honest, I still struggle with it A LOT! And lol I am definitely still a novice photographer… I can’t give you tips on your photos, as I’m no professional by any means!
Looking forward to the flair post! 😀
Hi there,
How do you place your subject (food) in relation to the window light? Do you use anything to control it or diffuse it?
I really appreciate your simple explanation of things!
Thanks.