

New York City is home to a critically-acclaimed restaurant called Dirt Candy, whose menu boasts some truly unique dishes: popcorn pudding, celery cheesecake, jalapeno hush puppies, mint chocolate nanaimo bars with a base of green peas…
You can all breathe a sigh of relief, because I did NOT use green peas in my mint chocolate nanaimo bars today.

However this relief might be fleeting once you see what I did use ![]() .
.

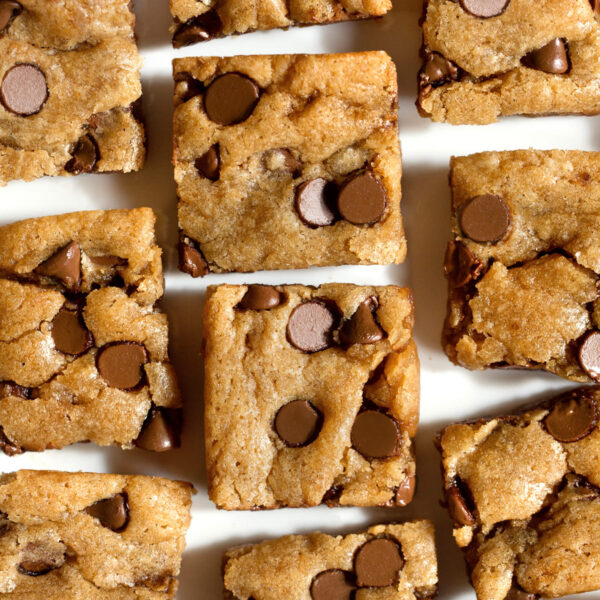
Nanaimo bars, a popular Canadian dessert hailing from Nanaimo, British Columbia, consist of three layers: a crumbly bottom later, creamy center, and a chocolate coating for the top. While Nanaimo Bars are traditionally full of butter, refined flour, and sugar, today’s recipe offers a much healthier alternative: with one sneaky ingredient you will never suspect!

Mint Chocolate Nanaimo Bars
Cream Layer:
(For a nut-free bar, feel free to just substitute your favorite mint chocolate chip ice cream for the cream layer.)
- 1 1/2 cups raw cashews or macadamia nuts (160g)
- 1/8 tsp salt
- scant 1/4 tsp pure peppermint extract
- 1/2 tbsp pure vanilla extract
- 1/4 cup virgin coconut oil (40g)
- 2 Nunaturals stevia packets, or 2 tbsp liquid sweetener (such as pure maple syrup)
- 3 oz raw spinach (85g or 2 very-loosely-packed cups)
Place the nuts in a cereal bowl and cover with water. Let soak 8 hours or overnight. (You can make the crust layer while you wait.) Drain and pat completely dry with a paper towel. Combine all ingredients in a vita-mix or high-quality food processor, and process until completely smooth. (This can take a few minutes in a food processor.)
Crust Layer:
- 1/2 cup raw almonds, walnuts, pecans, or a combination of these (or sunflower seeds for nut-free)
- 1/2 cup shredded coconut, unsweetened (I used the full-fat kind)
- scant 1/2 cup pitted dates (8 small dates) or raisins
- 1/8 tsp salt
- 2 tbsp cocoa powder, optional
Process all ingredients until even crumbs form. (Blenders will yield sticky mixtures, so it’s best to use a food processor.) Transfer to an 8-in square baking dish lined with parchment or wax paper going up the sides for easy removal. Using a piece of wax or parchment paper, smush into the pan until the crust evenly fills the bottom. Make the final layer:
Chocolate Layer:
- 1/2 cup cacao or cocoa powder (40g)
- 1/2 cup virgin coconut oil (80g)
- 2 tbsp pure maple syrup (or liquid sweetener of choice) (28g)
Melt the coconut oil if it is not already melted. Stir together all ingredients to form a smooth sauce. Spread over the other layers. Freeze just until chocolate has started to set, then cut into bars. It is best to cut after 10 minutes or less have elapsed, to prevent cracking. Then place back in the freezer to firm up completely. Bars can be stored in the freezer for a few weeks; thaw before eating.
—> View Chocolate Nanaimo Bars Nutrition Facts <—

P.S. Dirt Candy also sells a Rosemary Eggplant Tiramisu.
Hmmm…


These are delicious! I read through the comments. Am I the only one who had a very crumbly bottom layer? I used almonds. Any suggestions as to how to fix this for next time?
Hmm I didn’t have that problem. But try adding a little water to get it to stick more if you have that problem. And be sure to press down extremely firmly.
Thanks for this. Pressing down VERY firmly will probably help me.
or a couple more dates, protein powder. And yep – pushing down really hard with the rolling pin or back of a spoon
I just picked up the Dirt Candy cookbook from the library. I’ve been vegetarian for 22 years (vegan for 15 of those) and I’ve been developing my own recipes forever… I thought I’d seen pretty much everything. HELLO???? Between the Broccoli Icecream and the Zucchini Ginger Cake with Zucchini Cream & Candied Zucchini, I’m beside myself. Definitely have to cross the boarder to check that place out sometime (from another Canuck, and yes Nanaimo bars are Canadian) xo
This is a fantastic recipe… made it twice so far and I will be making it many times more. Thank you so much for this great recipe.
Can i sub coconut butter for this? 🙂
Oh my…these are AMAZING! I purposely told my husband there was spinach in the middle layer to gross him out, so I wouldn’t have to share…shame on me.
I added the cocoa powder to the crust like you suggested and found that all I needed for the top layer was a drizzling of chocolate.
Thank you so much for this delicious recipe!
I cannot wait to try this! I’ll record on a video and mention you on my blog.
Thanks for posting.
My friend made these and brought me some to try, and it was INCREDIBLE. I’ve never had nanaimo bars so I don’t have a frame of reference, but these are wonderful. The only problem is that they’re so delicious it’s hard to stop eating them. I’m making a batch for my brother today, hopefully they’ll be as delicious as my friend made them!
Hey, just a little follow up! I set out all the ingredients for these, which I already had on hand, and became very confused. Looking over the ingredients, I couldn’t see any way for these bars to work. But I’d tried them already and loved them so I gave it a shot. Oh my god! It’s like magic! I used liquid stevia drops as the only sweetener and these bars are so incredible! The ingredients themselves are so off-putting to me, but they transform into awesome. I have no idea how it works. It’s like the blender works magic. Seriously. I’m not a health-food type of gal, and I LOVE these. Don’t taste healthy at all. 🙂
I’m going to try adding a little pureed avocado to the cream layer. They look awesome.
These look soooo good! Thank you for sharing healthy recipes. I love the cookies and treats at http://www.chelsienicole.com/ they always come out so perfectly. It’s nice though that your whole site is devoted to yummy desserts!!
Is there something low sugar/ glycemic index that can be used in place of the dates?
As someone who lives in British Columbia and only 25 minutes away from nanaimo, these bars taste like a pretty great vegan version of the bar. I of course still love the original but I also love that these don’t have unsweetened coconut in them.
Hi Katie! I just made these the other day because my casein allergy has gotten way worse and I love mint chocolate. I reposted your recipe and pictures of my final product here! I live in Cape Town and we don’t have mint extract or oil in stores, so I ended up cutting open the mint oil pills you can usually find in the pharmacy. I also added a few mint leaves. Worked perfectly! My man and I both LOVE these and I’ll be making them again soon. Thanks so much!
I’ve had success using fresh mint leaves as a replacement for mint extract. These bars are my absolute favorites! My friends and colleagues thank you, and so do I!
Thank you so much for making them!
Hey Katherine, I also had GREAT success using whole peppermint leaves! If I make this again, I actually might just skip the spinach all together and use 2-3 cups peppermint leaves!! I just made it and used about 1.5 cups spinach and 1 1/4 cup peppermint leaves and I was so pleased with the strong peppermint flavor. I live in China and peppermint extract is hard to come by but I was able to come by peppermint leaves. Really lucky.
Yum! I’ve got to give these a try, your recipes are never disappointing!
Have you ever tried making these with fresh mint leaves instead of spinach? (Spinach is too much histamine for me).
I’m definitely trying these next!!!